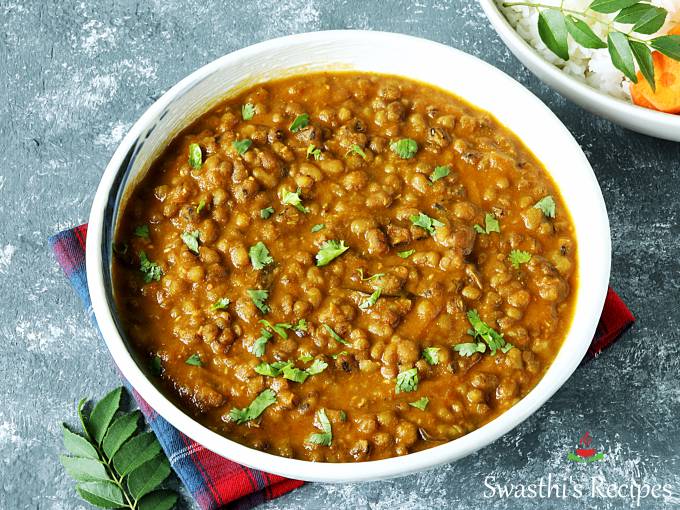
About Green Moong Dal
Green Moong Dal curry is a delicious Indian dish where whole mung beans (Sabut Moong) are cooked with onions, tomatoes, whole & ground spices. It is one of those dishes that is actually cooked in many regions of India. North Indians call it as Sabut Moong Dal, the Tamil Nadu version is known as Pachai Payaru curry, the Kerala dish is known as Cherupayar Curry & the Andhra version is well-known as Pesalu kura. Surprisingly all these taste different & so delicious! The recipe I have shared here is the simplest and it makes for a delicious, comforting and hearty meal when served over plain steamed rice or roti. Sometimes we also eat this with Jeera rice, Ghee rice or Turmeric rice. This recipe can be prepared in a stovetop cooker, instant pot or a regular pot. I have the instructions for all these methods. If using a instant pot, you may cook the rice as well along with the curry. Most Indians prefer to cook their lentils & legumes in a pressure cooker for convenience & for the lovely texture. A pressure cooker also helps you bypass the soaking step. Though Green gram can be cooked without soaking, it is best to soak them for at least 3 to 4 hours prior to cooking to avoid tummy problems. The fiber-rich skin on this whole lentils is harder to digest if cooked without soaking, especially when you cook in a pot. However to cook in the Instant pot I don’t soak them. More Dal recipesDal MakhaniMasoor DalChana dalRajma Recipe
How to Make Green Moong Dal (Stepwise Photos)
Preparation
If using instant pot, read the instructions from the recipe card below. This method is for stovetop to cook in a pot or traditional Indian pressure cooker.
- Rinse half cup green gram very well and soak in enough water for 3 to 4 hours. If you are in a hurry you may bring 1.5 cups water to a rolling boil and turn off. Add the rinsed green dal to the hot water and let soak for at least 45 mins.
- Prepare the following ingredients:
½ cup fine chopped onions (1 medium)¾ cup fine chopped tomatoes (1 medium)1½ teaspoons Ginger garlic paste (¾ inch ginger, 2 to 3 garlic cloves)1 green chilli (Indian/ Thai or Serrano peppers) Chopped or sliced, optional
- Measure and set aside the following:
½ teaspoon cumin seeds ½ to ¾ teaspoon Kashmiri red chili powder½ teaspoon garam masala¾ teaspoon coriander powder ¼ teaspoon turmeric¾ teaspoon salt (adjust to taste)
Make Green Moong Dal Curry
- Heat 1½ tablespoon ghee or oil in a pot or cooker. When the oil turns hot, add ½ teaspoon cumin & ¼ teaspoon mustard seeds (optional). The seeds will begin to splutter, then add curry leaves or bay leaf & green chilies. Saute until a nice aroma comes out.
- Add onions & saute until they turn golden. Add ginger garlic paste and saute for a minute until it begins to smell aromatic.
- Add tomatoes. Cook until they break down and turn mushy. I usually cover and cook at this stage to quicken the process.
- Add all the ground spices and salt – red chilli powder, garam masala, coriander powder and turmeric.
- Saute for a minute until the masala smells good.
- Drain the water from the green moong dal and add them here. Pour 1½ cups water for pressure cooking or 2½ cups if cooking in a pot. Soaked green gram doesn’t need a lot of water. So add carefully. If needed add more later.
- To cook in pot, bring it to a rolling boil on a high heat. Reduce the heat, cover and simmer them on a low to medium heat until cooked through and soft.
- To cook in pressure cooker, cover and pressure cook for 3 whistles on a medium heat. When the pressure releases, open the lid. If the dal is runny, evaporate the excess by cooking for a little longer. If it is too thick, pour some hot water and give a stir. I usually take off when there is little more moisture in the pot as the curry thickens when it cools down. Taste it and add more salt if needed. To thicken, mash some of the dal. Garnish with coriander leaves. Top green gram curry with ghee & squeeze in some lemon juice. Serve it with plain rice or roti. Related Recipes
Recipe Card
Green Moong Dal Curry first published in November 2014. Updated and republished in December 2019.
